Resizing a Fresh-start desktop disk within a course
If an existing Fresh Start machine is running low on disk space, you can easily add more by resizing it.
First, stop the Fresh-Start machine.
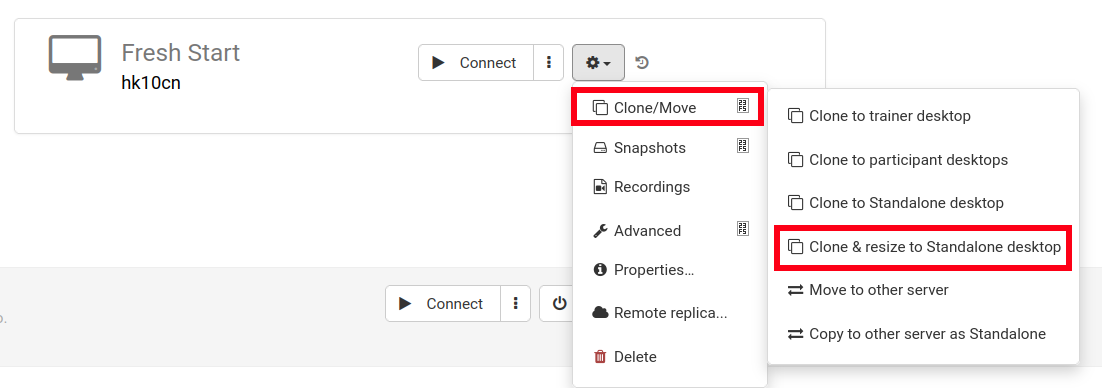
Then select Clone & Resize to make it a Standalone as illustrated (create an organization if you haven't yet)
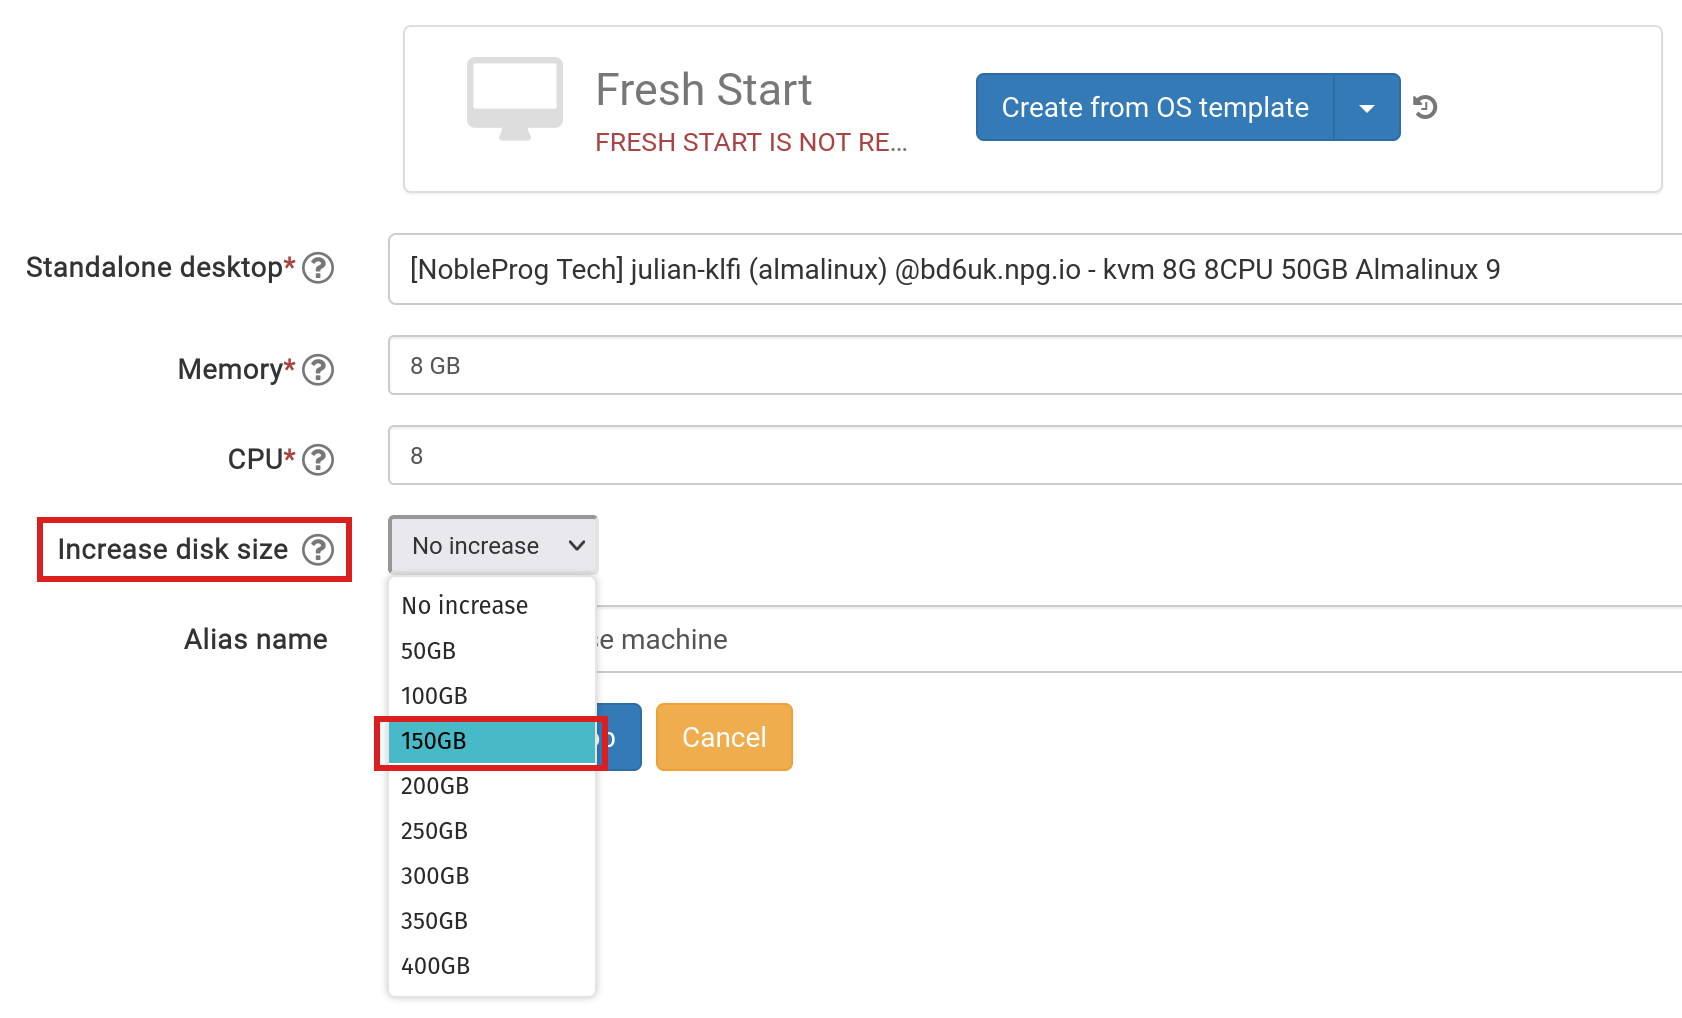
At this point, set the disk size to your required amount, and submit.
Go to the 'Standalones' link at the top of the page to find it and confirm it's there.
Back in the course, remove the Fresh-Start machine using the 'Delete' button.
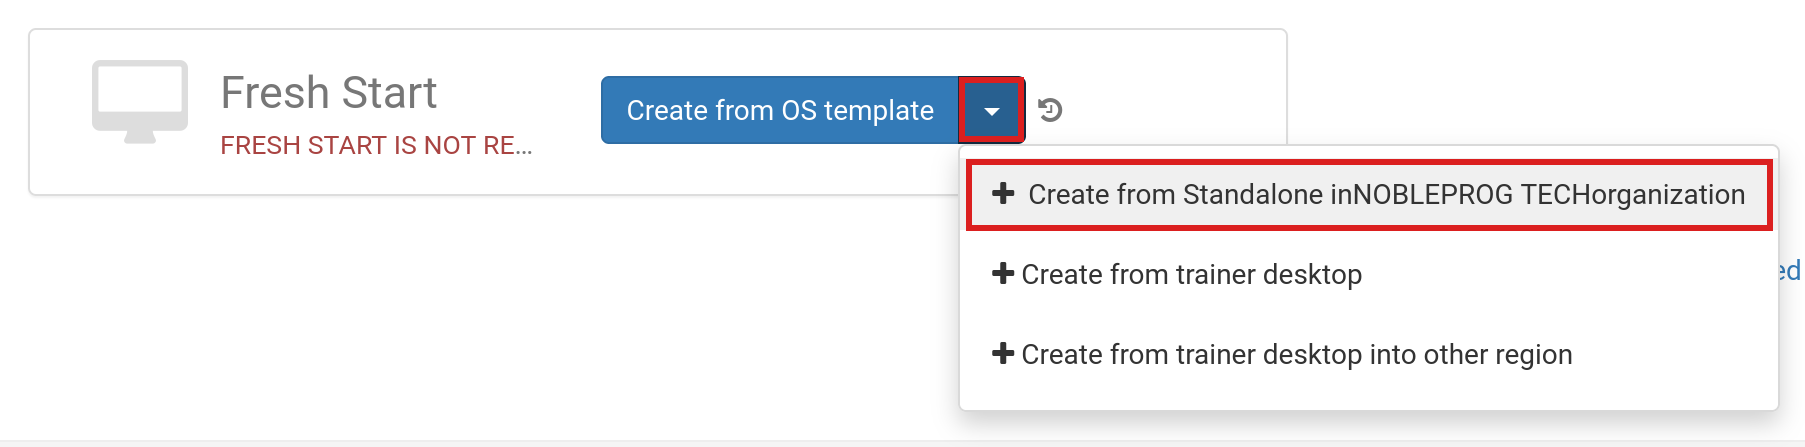
Click the 'Create Fresh-Start from my Standalone' button
In the 'Create from Standalone' dialog, you can also opt to increase the disk size if you didn't do so earlier
Enter an alias name if needed, then click the 'Create Desktop' button.
For standard DaDesktop Linux and Windows OS templates, the OS partition will be extended automatically. However, note that AlmaLinux standard templates partition the disk differently, which calls for additional manual steps as outlined below.
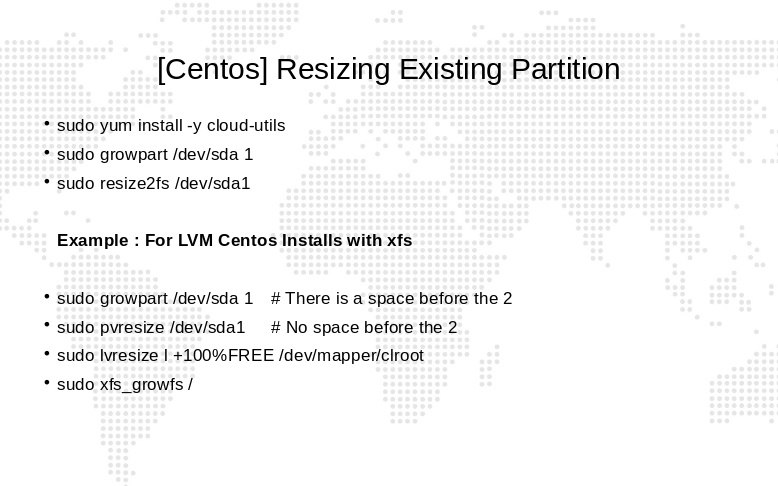
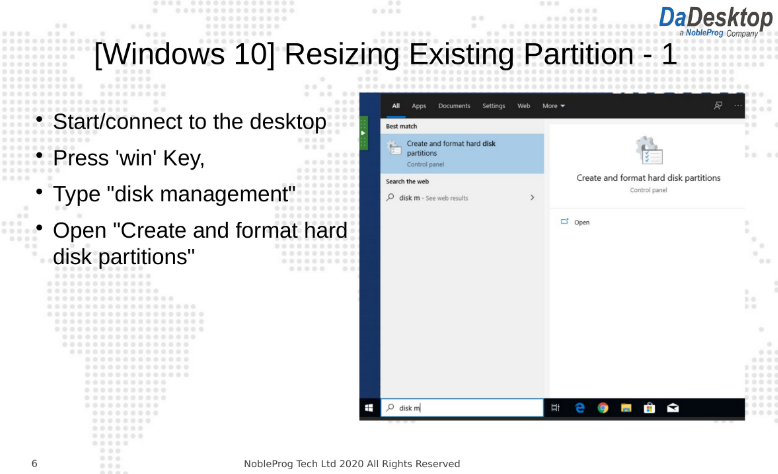
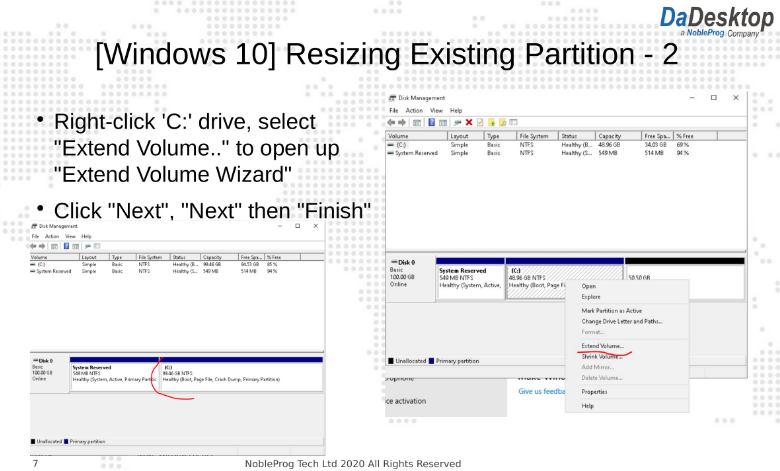
For custom OS templates, you may need to manually extend the partition(s); the steps below show how.
For custom OS templates and Almalinux standard templates, follow these steps to extend the partition(s)
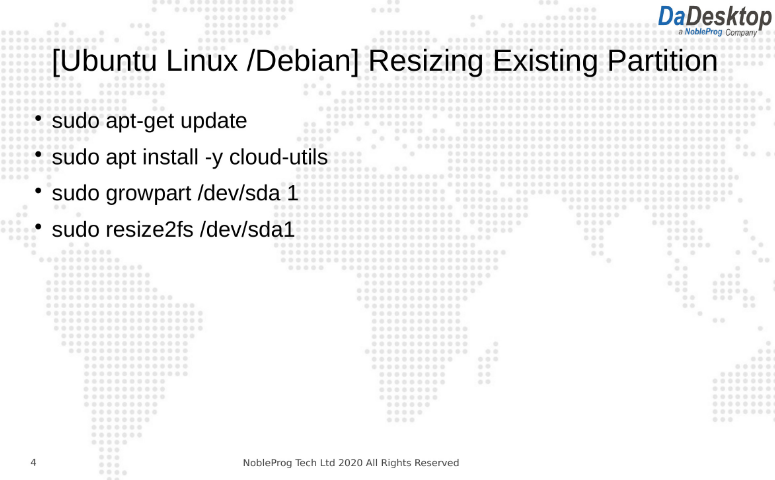
Follow the instructions to adjust your desktop partitions
- Open a terminal or command prompt
- Enter the commands shown below